

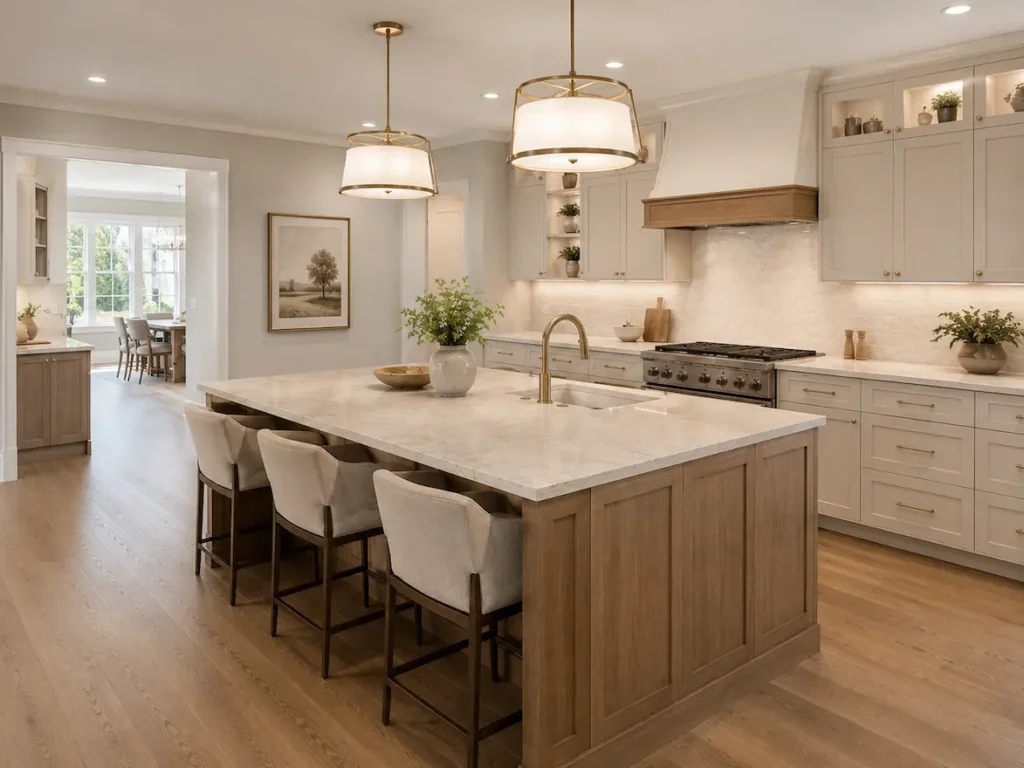
Custom kitchen islands are one of the most requested features in Dallas kitchen remodels, and for good reason. A well-planned island can change how a household moves through the kitchen, how much counter space is available on a busy weeknight, and how the room functions when more than one person is cooking at the same time. Before choosing a shape, a finish, or a countertop material, the island needs a clear job to do inside the layout.
Most homeowners start with a picture from a magazine or a showroom, then try to fit that picture into their own kitchen. That approach usually creates friction later. An island that looks striking in a photo can still block a walkway, crowd the stove, or leave too little room for cabinet doors to swing open. The island has to answer to the room it sits in, not the other way around.
We have walked through enough Dallas kitchens to know that the island is rarely just a countertop with legs. It carries prep space, seating, storage, sometimes a sink or cooktop, and it often becomes the spot where the whole family ends up standing. At Lone Star Remodeling Dallas, we treat the island as the anchor of the kitchen remodeling plan, and we start by asking how the household actually cooks before we talk about finishes.
Why Custom Kitchen Islands Start With How You Actually Cook
Every kitchen has a rhythm, and that rhythm is different depending on who lives in the house. A family that cooks together every night needs an island that supports two or three people working at once. A household that mostly reheats meals and hosts on weekends needs something closer to a serving counter with a bit of seating attached. Kitchen island works best when they are sized and shaped around that daily rhythm instead of a generic template.
The mistake we see most often is homeowners choosing an island size based on the room’s square footage alone. A large kitchen does not automatically need a large island, and a smaller kitchen does not have to skip one altogether. What matters more is the distance between the island and the surrounding counters, appliances, and doorways. If two people cannot pass each other comfortably while the oven door is open, the island is already working against the room.
Custom kitchen islands also need to account for how food actually moves from the refrigerator to the counter to the stove to the sink, and this is where many otherwise well-designed freestanding kitchen counters fall short. That path, sometimes called the kitchen’s work triangle, should stay clear and short. An island that interrupts this path with the wrong turn or too little clearance forces awkward movement into a space that people use multiple times a day.
Work Zones and Traffic Flow Around the Island
Kitchen work zones only function well when the island respects the boundaries between them. Prep space needs to sit near water and heat sources without crowding either one. Cleanup space needs enough counter on both sides of the sink for dirty dishes and drying racks. When an island tries to do too much in too little footprint, one of these zones usually loses out, and it is almost always cleanup. Custom kitchen islands built without this zoning in mind tend to become a catch-all surface instead of a working part of the kitchen.
Traffic flow is the other half of this equation. Most kitchens need at least 42 inches of clearance around an island for a single cook, and closer to 48 inches if two people regularly work in the kitchen at the same time or if the space doubles as a walkway to another room. Tight clearance might look fine on a floor plan, but it feels cramped the moment someone opens a dishwasher or bends down to grab a pan. This is one reason custom kitchen islands should always be measured against real foot traffic patterns rather than a general rule of thumb.
We have seen custom kitchen islands scaled back mid-project because the original size looked good on paper but left barely enough room to open the refrigerator door fully. Measuring the walkways before finalizing the island shape saves that kind of late correction, and it protects the parts of the kitchen that get used every single day, not just during holidays or dinner parties.
Seating, Storage, and the Daily Balancing Act
Kitchen island seating sounds simple until it competes with everything else the island is supposed to hold. Overhang for stools needs roughly 12 inches of clearance, and that overhang eats into the counter space available for prep work on the opposite side. A family that wants casual breakfast seating and serious cooking space in the same footprint often needs a longer island than they originally planned, or a slightly different shape altogether.
Kitchen island storage carries its own tradeoffs. Deep drawers work well for pots and pans but take up more depth than shallow cabinets built for trays and cutting boards. Open shelving adds visual interest but only stays useful if the household is disciplined about what sits out in view. Custom kitchen islands give homeowners the freedom to mix drawer sizes, cabinet styles, and even appliance garages, but every added feature narrows the space left for something else.
The households that end up happiest with their custom kitchen islands are usually the ones who ranked their priorities honestly before construction started. Seating for the kids after school, storage for small appliances, or open counter space for holiday baking rarely all fit at full scale in the same island. Deciding what matters most, and what can live elsewhere in the kitchen, keeps the final result from feeling like a compromise nobody chose on purpose.
Budget and Timeline Decisions That Shape the Project
Plumbing and electrical work are the two decisions that move custom kitchen islands from a straightforward carpentry job to a more involved remodel. Adding a prep sink or a cooktop to the island means running new lines under the floor, which affects both the budget and the timeline. Homeowners who want these features should plan for them early, since retrofitting plumbing after cabinets and flooring are installed is far more disruptive than including it in the original scope.
Countertop material is another decision that carries more weight than it first appears. A waterfall edge or a large slab of natural stone can define the whole kitchen, but it also adds cost and requires the base cabinetry to be built with tighter tolerances. Homeowners who want that look should confirm the island’s structural support early, since stone overhangs need bracing that has to be planned before the cabinets go in, not after.
Electrical outlets, pendant lighting, and ventilation for a cooktop all add line items that are easy to underestimate. None of these decisions are wrong to make, but each one shifts the schedule and the budget in ways that are much easier to absorb when they are discussed during planning instead of discovered midway through the build. Homeowners who compare quotes for custom kitchen islands should ask what is included in the base price and what counts as an upgrade, since these line items vary widely between contractors.
Common Mistakes Homeowners Make With Custom Kitchen Islands
The most common mistake is choosing the island’s finish before the layout is settled. Cabinet color, hardware, and countertop pattern matter, but they are meaningless if the island’s size or placement does not work with the rest of the kitchen. We always encourage homeowners to lock in dimensions and function first, then move on to the visual choices once the layout is proven to work on paper and, ideally, taped out on the actual floor.
Another frequent misstep is underestimating how much the island will be used for storage that has nothing to do with cooking. Mail, school supplies, chargers, and other household clutter tend to migrate toward any open counter space, and an island without dedicated storage for these items often ends up looking cluttered within a few months of the remodel being finished. Custom kitchen islands designed with a landing zone for everyday items tend to stay tidier and function better long after the remodel is complete.
Custom kitchen islands can also fail when the ventilation or lighting plan is treated as an afterthought. A cooktop on the island needs a hood or downdraft system sized correctly for the space, and pendant lighting needs to be positioned for both function and proportion. Skipping this planning step is one of the easier mistakes to avoid, and one of the more expensive ones to fix later.
Planning Before You Buy Materials or Start Construction
Before ordering cabinets, countertops, or appliances, it helps to walk through the kitchen with painter’s tape and mark the island’s actual footprint on the floor. This simple step reveals problems that measurements on paper tend to hide, like a walkway that feels tighter than expected or a sightline into the living room that gets blocked.
It also helps to think through how the island will be used at different times of day, not just during a dinner party. Morning routines, homework time, and weeknight cooking all put different demands on the same surface, and a layout that only accounts for entertaining can fall short the rest of the week. Custom kitchen islands should hold up to ordinary Tuesday nights just as well as they do to a holiday gathering.
Materials should be the last major decision, not the first. Once the layout, seating, storage, and utility needs are settled, choosing countertop stone, cabinet finish, and hardware becomes a much simpler process, because those choices are filling in a plan that already works rather than trying to rescue one that does not. This order of operations is what separates custom kitchen islands that feel effortless from ones that feel like a series of compromises stacked on top of each other.
When It’s Time to Talk to a Local Contractor
Some kitchen decisions are simple enough to sketch out alone, but island placement usually benefits from a second set of eyes that has seen how these layouts perform after the drywall is closed up. A local contractor familiar with Dallas homes can flag structural issues, existing plumbing lines, or load-bearing walls that are not obvious from a floor plan alone.
Working with a team that stays involved from design through the final walkthrough also protects against the kind of mid-project surprises that stretch budgets and timelines. Coordinating plumbing, electrical, cabinetry, and countertop installation in the right order keeps a kitchen remodel moving without unnecessary delays or rework, which matters even more when custom kitchen islands include a sink, cooktop, or built-in appliance.
At Lone Star Remodeling Dallas, custom kitchens are one of the projects we plan the most carefully, because the layout affects everything that happens in the kitchen for years afterward. If you are weighing island shapes, seating, or storage for your own kitchen, contact us, and we can walk through a layout that fits how your household actually cooks.
FAQ
How big should custom kitchen islands be?
Size depends less on the room’s square footage and more on the clearance around it. Most kitchens need at least 42 inches of walking space on every side, more if two people cook together regularly.
Do custom kitchen islands need plumbing or electrical work?
Only if they include a prep sink, cooktop, dishwasher, or outlets. These additions require new lines run under the floor, which should be planned before construction starts, not after.
How much seating fits on a kitchen island?
Each stool needs roughly 24 inches of width and 12 inches of counter overhang. A three-seat island typically needs at least 8 feet of length once prep space is factored in.
Can a small kitchen have a custom island?
Yes, though the design usually needs to be simpler, with a narrower footprint and fewer built-in features, so the room still has enough clearance to move through comfortably.
What should I decide before ordering island materials?
Lock in the layout, seating count, storage needs, and any plumbing or electrical additions first. Materials and finishes should be the final decisions, not the starting point.