

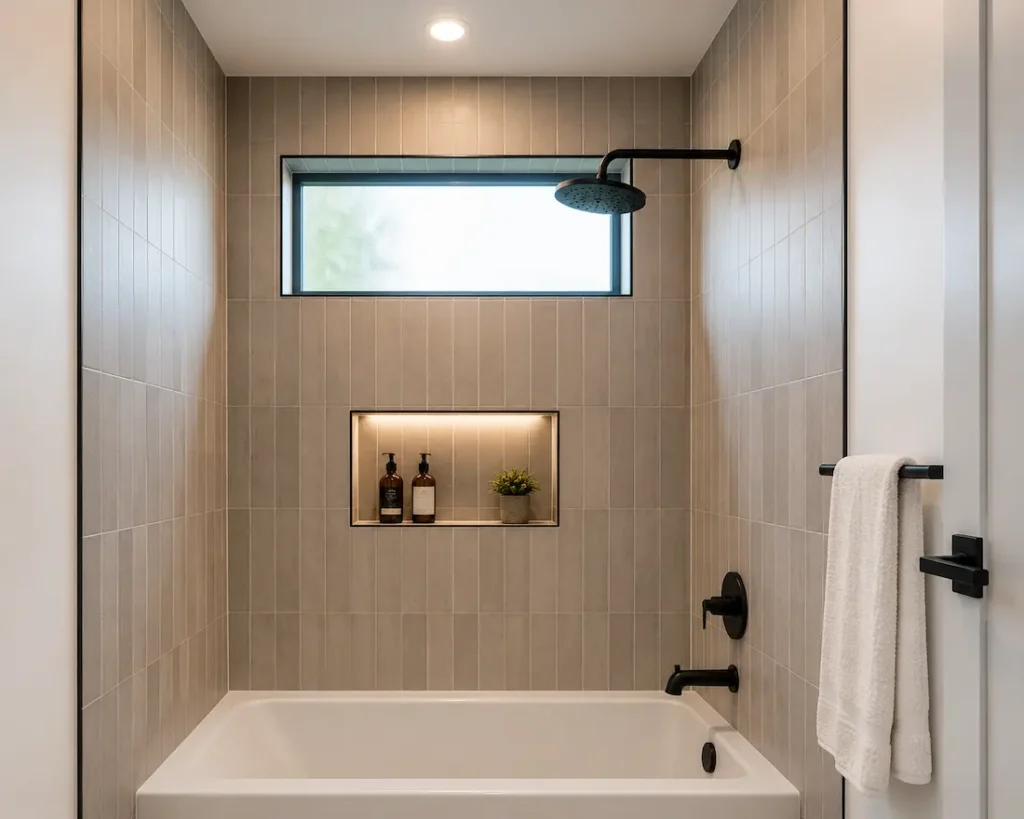
A bathroom shower remodel reads like finish project from the outside. New tile, a frameless glass enclosure, a rain showerhead, a linear drain. The visible components are easy to research, easy to price independently, and easy to imagine in the finished space.
What is harder to see, and what determines whether any of those components perform the way they should, is the sequence of hidden decisions that precede them: where the drain sits in the floor before concrete is poured, where the valve body is roughed in before the wall is closed, how the waterproofing membrane wraps the assembly before a single tile is set.
The bathroom shower remodel planning problem is fundamentally a sequencing problem. Each visible feature of the finished shower depends on a dimension or a condition that was established earlier in the construction process and is no longer accessible once the project moves forward. The tile selection depends on the substrate.
The glass enclosure depends on the tile layout. The valve trim depends on the rough-in location. The drain grate depends on the floor slope. None of those relationships are optional, and none of them can be resolved cleanly in reverse order.
At Lone Star Remodeling Dallas, every bathroom shower remodel starts with the rough-in conversation, not the tile conversation, because the choices made before the walls close are the ones that either support or constrain everything that follows.
Why the Drain Location Is the First Design Decision
Shower remodel planning begins at the floor, specifically at the drain location, because that single point determines the slope direction of the entire shower floor, the layout geometry of the floor tile, and the position of the curb or barrier at the enclosure entry. Moving a drain after concrete has been poured, or after a mortar bed has been set, is a significant structural intervention.
A center drain in a square or rectangular shower produces a four-way slope that directs water from all sides toward the center point. This geometry works cleanly with square and rectangular tile formats and is the easiest configuration to waterproof because the slope transitions are symmetrical.
A linear drain positioned at one end wall or along one side wall produces a single-direction slope across the entire floor plane, which reads as more contemporary and accommodates large-format tile with fewer cuts but requires a longer waterproofed channel rather than a single drain body.
The drain type also determines the waterproofing detail at the floor-to-drain transition, which is one of the most technically specific details in any bathroom shower remodel.
A linear drain requires a channel body that integrates with the membrane system along its full length rather than at a single point. Selecting the drain type before the waterproofing system is specified, and before the floor membrane is installed, keeps those two systems coordinated rather than forcing an improvised connection between a drain that arrived first and a membrane that had to work around it.
Shower Valve Placement: Rough-In Position and What It Controls
Shower valve placement is the rough-in decision with the most direct impact on daily usability, and it is one that cannot be revised without opening the wall after it is set. The valve body controls water temperature and volume, and its position determines where the user stands to operate it, whether that position is inside or outside the water stream before temperature is adjusted, and how the trim plate and handle interact with the surrounding tile layout.
The standard guidance for valve rough-in height in a bathroom shower remodel places the valve body between 38 and 48 inches above the finished shower floor, with the exact height depending on the household’s preferences and the handle style being used.
A thermostatic valve system, which separates temperature control from volume control, requires two rough-in points at coordinated heights and positions that need to be established before the wall is framed, not after the tile is selected. A pressure-balancing valve with a single handle is a simpler rough-in but still requires the same positional clarity before the wall closes.
The valve position also affects the tile layout in ways that are worth planning before the tile is ordered. A valve trim plate centered on a grout joint looks different from one centered on a tile field, and most homeowners have a preference once they see the options. That preference needs to be communicated to the tile setter before layout lines are drawn, because adjusting the tile layout after it is set to accommodate a trim plate that arrived late is not a clean correction.
Custom Shower Waterproofing: Membrane Systems and Their Specific Applications
Custom shower waterproofing is not a single product or a single method. It is a system, and the components of that system need to be specified and installed in a sequence that produces a continuous waterproofed assembly from the drain to the top of the tiled field, with no gaps at corners, seams, penetrations, or transitions.
The membrane product, the substrate, the adhesive, and the drain connection all need to be compatible with each other and with the tile being installed over them. Liquid-applied membranes, such as those in the RedGard category, are applied with a roller or brush directly to cement board or a similar substrate, cure to a flexible film, and are then tiled over with a modified thinset.
They are well-suited to complex geometries because they conform to any surface without cutting or folding, and they can be applied at built-in niches, curb tops, and other irregular shapes without the seaming issues that arise with sheet membranes in those locations. Their limitation is that coverage uniformity depends on application technique, and thin spots in the cured film are not visible once tile is installed over them.
Sheet membranes, such as those in the Schluter Kerdi or similar product families, are fabric-reinforced sheets bonded to the substrate with unmodified thinset and overlapped and bonded at seams.
They provide a more consistent membrane thickness across the field because the material itself has a defined cross-section, and they integrate with compatible drain assemblies through a specific bonding flange that creates a documented transition between the membrane and the drain body.
How the Shower Floor Slope Affects Every Surface Above It
The shower floor slope in a bathroom shower remodel is a construction requirement, not a design preference. Water needs to drain, and the floor needs to direct it there without pooling at the perimeter, at the curb, or at any low point between the tile joints.
A minimum slope of 1/4 inch per foot toward the drain is the standard for a tiled shower floor, and achieving that slope consistently across the full floor plane requires either a pre-sloped mortar bed or a sloped foam substrate, each of which has specific installation requirements.
A mortar bed shower floor is built up from the substrate with a sand-cement mix shaped to the required slope before waterproofing and tile are applied. It is the traditional method, familiar to most experienced tile setters, and it allows the slope to be customized to any drain position or floor geometry.
It adds weight to the floor assembly, which is worth confirming against the floor structure in older Dallas homes where joist spans and subfloor thickness were not designed around the additional load of a thick mortar bed shower floor.
Pre-sloped foam substrates, such as those offered by Schluter and similar manufacturers, are factory-formed to the required slope for standard drain positions and provide a lightweight alternative to the mortar bed. They are compatible with sheet membrane systems and integrate with matching drain assemblies, which keeps the full floor assembly within a single manufacturer’s system specification.
Shower Glass Measurements and What Drives Them
Shower glass measurements in a bathroom shower remodel are not taken from a design drawing. They are taken from the finished tile installation, after the tile is set and the grout is cured, because the glass panels need to fit the actual opening rather than the theoretical one. Ordering glass before tile is complete produces enclosures that fit the plan and not the room, and the corrections involved when frameless glass does not fit the actual opening are expensive and time-consuming.
The measurement process for a frameless glass enclosure involves recording the actual height from the tile floor to the ceiling or header, the actual width of the opening between tiled walls or between a tiled wall and a return panel, and the plumb of each wall relative to the other.
Shower walls that are not plumb to each other produce a glass panel with a tapered profile if the measurement is taken square, or a panel that does not sit flush against the wall at one edge if it is fabricated square and installed into a non-square opening. The glass fabricator needs to know the actual geometry of the opening, including any out-of-plumb condition, before cutting the glass.
Anchors that land on tile adhesive over cement board have a different load capacity than anchors that reach a stud. In a bathroom shower remodel where the glass enclosure is part of the original scope, the framing behind the anchor locations should be reinforced before tile is installed, because adding backing after the tile is set requires removing the tile at those locations to reach the framing.
Niche Planning and How It Fits the Waterproofing Sequence
A recessed niche in a shower wall is one of the most requested features in a bathroom shower remodel and one of the most consequential to plan correctly. The niche is a horizontal pocket cut into the wall framing between studs, which means its location is constrained by stud spacing, and its back and side surfaces are part of the waterproofed assembly that needs to be continuous with the surrounding wall membrane.
Niche placement needs to be established before framing is complete. A niche that lands on a stud requires that the stud be relocated, which introduces structural implications if the wall is load-bearing.
A niche positioned without confirming the stud layout may land exactly where a stud is, and relocating it at the tile-setting stage means opening the wall, modifying the framing, repairing the substrate, and re-waterproofing the affected area before any tile work can proceed. These are avoidable complications when the niche location is confirmed during the framing phase.
The waterproofing detail at the niche is specific. The back wall, the two side walls, and the floor of the niche are all waterproofed surfaces, and the transitions between them, particularly the inside corners where the niche floor meets the side walls, are the locations where the membrane is most likely to be applied inconsistently under the pressure of a tight installation space.
Tile Layout and the Decisions That Precede It
Tile selection in a bathroom shower remodel is the decision most homeowners make first and the one that should wait until the shower dimensions, the drain location, the valve position, and the niche placement are all confirmed. The tile format, the layout direction, the grout joint width, and the accent or feature strip position all interact with the physical geometry of the shower in ways that produce either a coherent result or a series of awkward cuts and misaligned joints.
Large-format tile in a shower, defined as any tile with at least one dimension over 15 inches, requires a substrate with deflection performance that exceeds what most residential shower floors and walls provide without modification. Deflection in the substrate causes grout joint cracking in large-format tile because the tile spans a larger area and transmits any movement in the substrate directly to the joint.
The grout joint width is also a technical decision, not only an aesthetic one. A large-format rectified tile can be installed with a joint as narrow as 1/16 inch. A handmade or tumbled tile with natural variation in edge thickness requires a wider joint to accommodate that variation without lippage between adjacent tiles.
Our team at Lone Star Remodeling Dallas addresses these decisions during the planning stage as part of a coordinated bathroom remodeling scope that treats tile selection and substrate preparation as connected decisions rather than independent ones.
Questions to Bring Into a Shower Remodel Consultation
The homeowner who arrives at a bathroom shower remodel consultation with technical questions gets materially more useful information from that conversation than one who brings tile samples and a general budget number. The questions worth preparing in advance target the hidden decisions that determine whether the visible components of the finished shower perform over time.
Ask how the drain type and the waterproofing membrane system are specified and whether they come from the same manufacturer’s system. Ask where the valve rough-in will be positioned, how that position interacts with the tile layout, and how the showerhead height is determined relative to the finished floor. Ask when shower glass measurements are taken and whether the glass fabrication is coordinated with the tile installer.
Ask whether the niche location has been confirmed against the framing layout, and how the niche surfaces are waterproofed as part of the field membrane system. Ask which elements of the proposed scope require a permit in Dallas and how the inspection sequence affects the construction timeline.
When you are ready to put those questions to a team that will answer them with a coordinated construction plan rather than a general estimate, contact Lone Star Remodeling Dallas to schedule a site assessment and develop a bathroom shower remodel scope with clear design and construction priorities built around your specific space.
FAQ
What is the correct sequence for a bathroom shower remodel?
Drain location and valve rough-in first, then waterproofing, then tile, then glass measurements, then enclosure fabrication and installation. Each step depends on the one before it.
How does shower valve placement affect the finished tile layout?
The valve trim plate position relative to grout joints and tile field needs to be coordinated before the tile layout is drawn, not after the tile is set.
What is the difference between liquid-applied and sheet membrane custom shower waterproofing?
Sheet membranes provide consistent thickness and documented drain connections. Liquid membranes conform to complex geometry but depend on application technique for coverage uniformity.
When should shower glass measurements be taken for a bathroom shower remodel?
After tile is set and grout is cured. Measuring from a design drawing rather than the actual finished surfaces produces enclosures that fit the plan, not the room.
Does a bathroom shower remodel in Dallas require a permit?
Scope determines the requirement. Plumbing relocation, new electrical circuits, and structural modifications almost always require a City of Dallas permit before work begins.