

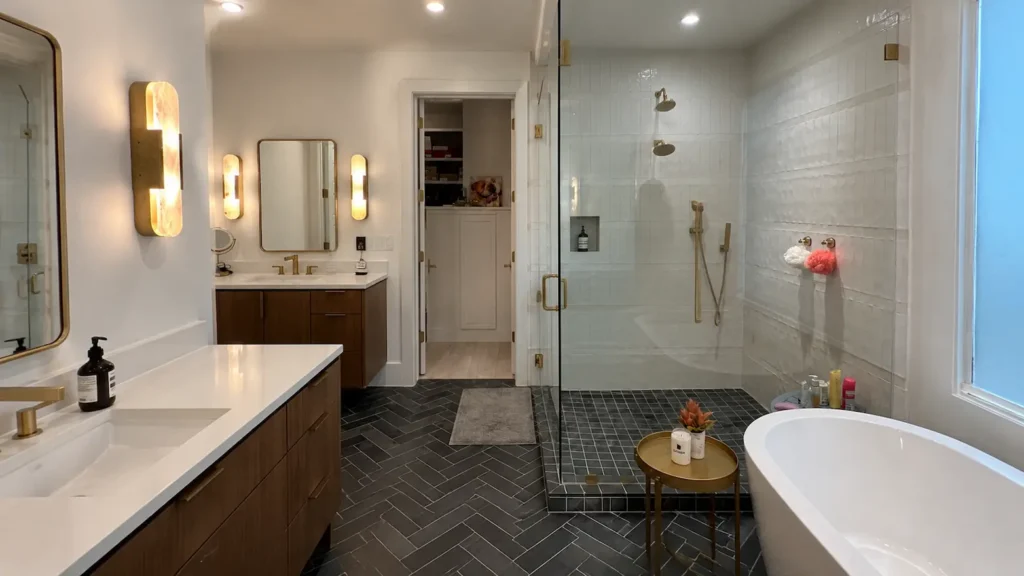
A full bathroom renovation is one of the complex projects a homeowner can take on. It is not like an update or a quick change of fixtures. A complete renovation involves working with plumbing, electrical, waterproofing, tile and finish installation. These tasks need to happen in an order. Each step depends on the one that comes before it. If the order is wrong or if someone doesn’t realize what a step really needs problems can show up weeks or months after the work is done.
Homeowners who want to do a bathroom renovation in Fort Worth and other places in the DFW area often have a clear vision of the final bathroom they want. They might not know exactly how to get there without running into expensive surprises along the way. Understanding the order of work the connections, between trades and the decisions that need to be made before starting the project is what helps keep a renovation on track instead of getting stuck waiting for answers that should have been handled early.
At Lone Star Remodeling Dallas, the planning phase is where we spend the time before starting any work. What is decided during those talks is what makes everything else go smoothly.
What a Full Bathroom Renovation Actually Covers
A full bathroom renovation usually means replacing everything: tiles, fixtures, vanity, lighting and in cases the hidden systems that make all of it work. That scope is what separates a full bathroom renovation from an update and it is also what makes sequencing so important to the outcome.
The project moves through phases. Demolition comes first. Shows conditions that are hidden until walls and floors are opened. Rough‑in work follows, covering plumbing, electrical and any structural changes. Waterproofing and substrate preparation happen before tile goes in. Tile installation comes before fixture. Finish work. Each phase has its lead times, inspection needs and decision points that affect everything that comes later.
Homes in Fort Worth built in the 1980s and 1990s often show problems during demolition that need the scope to change: galvanized supply lines, subfloor that is too thin for the planned tile or waterproofing layers that have long since worn out. None of those findings are unusual. None of them are unmanageable but those issues must be counted before the budget, for the full bathroom renovation is treated as fixed.
Full Bathroom Demolition: What Gets Removed and What Gets Revealed
Full bathroom demolition is the phase most homeowners underestimate in both scope and significance. Removing tile, backer board, fixtures, and flooring is physical work, but what that removal exposes is what actually shapes the renovation that follows.
Subfloor condition is one of the most consistent findings in a complete bathroom renovation. Water intrusion around the toilet flange, the tub surround, or the shower pan frequently causes subfloor damage that stays hidden until demolition opens the floor. Soft spots, delamination, or rot require repair before any new substrate or tile goes over them. Tiling over a compromised subfloor without addressing the underlying damage produces cracked grout and failed tile within a year or two of project completion.
Wall framing condition matters for a different reason. Plumbing and electrical rough-in runs through the framing, and the position of existing studs, blocking, and mechanical lines determines what can be relocated and at what cost. A shower niche planned for an exterior wall may run into insulation constraints that affect feasible depth. A vanity centered on a wall with a plumbing stack behind it may require a design adjustment. These are conditions to work with, not obstacles that derail the plan, but they need to be identified before scope commitments are made.
Homes built before 1980 in the Fort Worth area may involve asbestos-containing materials or lead paint. Disturbing those materials without proper assessment and handling creates health and liability exposure that no renovation savings justify. A licensed contractor identifies testing requirements and manages abatement if needed as part of the demolition phase.
Bathroom Rough-In Planning: Where Everything Gets Fixed in Place
Bathroom rough-in planning is where design decisions get translated into physical infrastructure. Plumbing rough-in positions the supply and drain lines for every fixture. Electrical rough-in positions circuits, outlets, switches, and fan connections. Both need to be complete and inspected before walls are closed, because correcting either after that point means reopening finished surfaces.
The sequence matters because rough-in establishes the fixed points around which everything else is built. A toilet rough-in at 12 inches from the finished wall is the standard residential dimension, but some older Fort Worth homes were built with 10-inch or 14-inch rough-ins that limit fixture compatibility. Confirming that measurement before selecting the toilet avoids an installation problem that requires either a non-standard fixture or a plumbing relocation.
Shower valve position should allow temperature adjustment before stepping into the spray zone, which means the valve needs to sit on the entry-adjacent wall rather than the back wall. That positioning has direct implications for where supply lines run during rough-in, and it needs to be confirmed at that stage. Relocating it after tile is set is an expensive correction that is entirely avoidable with thirty minutes of conversation during the planning phase.
Electrical rough-in for a full bathroom renovation typically covers a GFCI-protected circuit for vanity outlets, a dedicated circuit for the exhaust fan, and separate switch legs for mirror lighting and overhead lighting when those are on independent controls. Heated flooring or a steam generator each require dedicated circuits that need to be included in the rough-in scope and confirmed against the panel’s available capacity before work begins.
Complete Bathroom Waterproofing: The Phase That Protects Everything Above It
Complete bathroom waterproofing is the least visible and most consequential phase of a full bathroom renovation. Every surface inside the shower enclosure, and the floor in wet zone areas, needs a continuous membrane that is properly overlapped at corners and transitions and fully cured before tile adhesive goes over it.
The most common waterproofing failures in residential bathrooms are not dramatic events. They are the cumulative result of thin membrane application at corners, inadequate transition coverage where the shower floor meets the wall, or unsealed penetrations around drains and niches. Water finds those gaps over time, and by the time damage is visible on the finished surface, the substrate behind the tile has typically been degraded for months.
The appropriate time to upgrade waterproofing in a complete bathroom renovation is before new tile goes in. Applying a contemporary sheet or liquid-applied membrane system over properly prepared cement board or a cementitious substrate delivers protection that the original installation in most pre-2000 DFW homes did not include. Within an ongoing renovation, the cost of that upgrade is modest relative to the overall project. Addressing waterproofing failures after a new bathroom is complete is a different conversation entirely.
Our bathroom remodeling services treat waterproofing assessment and installation as a standard part of every complete renovation project, because it is the phase where compromises produce the most expensive long-term consequences.
Finish Installation Sequence: Why Order Matters More Than Speed
Finish installation is the moment when a full bathroom renovation begins to look like the product. I notice that at this point the room starts to feel complete. Finish installation is also the stage where mistakes in the order of work become costly to fix.
Tile, cabinetry, fixtures, mirrors, and accessories all depend on what comes before them. Finish installation that places these items out of order creates problems and rework adding time and cost without improving the result. When I see items out of order I see problems.
Tile goes first among finish elements because it sets the finished floor elevation that everything else follows. Vanity height, toilet in clearance shower door sill position and threshold details all measure from the finished tile surface. Finish installation that puts tile after cabinetry or fixtures creates gaps and transitions that look unresolved no matter how well the individual items were installed. I see gaps that’re hard to fix.
Vanity installation follows the tile. Comes before countertop templating when a stone or custom surface is chosen. Stone countertops for bathroom vanities are templated after the cabinet is set in its position because the template captures the actual installed geometry instead of a nominal dimension. Finish installation that templates before the cabinet is, on the floor produces a countertop that rarely fits without adjustment. I have seen countertops that need adjustment.
Plumbing fixture trim, lighting, mirrors, and accessories are the last elements installed in a complete bathroom renovation. Installing them before painting, grouting, and caulking are complete means they need to be removed or protected during those finishing steps, which adds labor and increases the risk of damage to finished surfaces. The sequence is not arbitrary, and respecting it is one of the clearest indicators of how a contractor manages a project.
Mistakes That Cost the Most in a Full Bathroom Renovation
The decisions that create the most expensive problems in a full bathroom renovation are rarely dramatic. They tend to be incremental: a material ordered before the substrate was confirmed, a fixture selected before the rough-in was finalized, a scope commitment made before demolition revealed actual conditions.
Ordering tile before confirming square footage with an adequate waste factor is one of the most consistent budget problems in renovation projects. Standard waste for most tile formats runs between 10 and 15 percent over the net area. Diagonal layouts, large-format tiles, and custom cuts require higher waste factors. Running short on tile mid-installation is a significant disruption when the tile has a four-week lead time or belongs to a discontinued production lot.
Skipping a plumbing pressure test after rough-in and before walls are closed occasionally produces a leak discovery after tile is installed. That test costs nothing and confirms that supply connections are sound before they are buried behind substrate and finished surfaces. Most jurisdictions in the DFW area require this inspection as a permit milestone, which is another reason permit requirements should be confirmed before construction begins rather than after.
Timeline expectations in homeowner planning are consistently optimistic. A full bathroom renovation involving plumbing changes, custom tile, and specialty fixtures typically runs three to four weeks of active construction, not counting lead times for materials that may carry four to eight week delivery windows. Starting material research early and confirming lead times before the project start date is set prevents the situation where the contractor is ready and the materials are not.
Planning a Full Bathroom Renovation in Fort Worth
Full bathroom renovation projects in Fort Worth and the surrounding DFW area involve regional conditions worth factoring into the planning process before scope is finalized. Slab-on-grade construction is prevalent across much of the metroplex, which means drain repositioning requires cutting the slab rather than accessing lines from below. That is a manageable scope item, but it adds cost that should be in the budget if any fixture relocation is being considered.
North Texas water hardness accelerates mineral buildup on glass, fixtures, and grout, which is relevant to material selection in a complete bathroom renovation. Fixture finishes with durable PVD plating, frameless glass with hydrophobic coating, and grout in coordinating medium tones perform better over time in this water chemistry than selections made without that reality in mind.
Permit requirements for a full bathroom renovation in Fort Worth typically include plumbing and electrical permits when those systems are being modified. A licensed contractor identifies the applicable permits, schedules inspections at required milestones, and manages the documentation as part of the project. Homeowners who bypass the permit process take on complications at resale and liability for uninspected work that no short-term savings offset.
Getting the Planning Right Before the First Wall Opens
If you start a bathroom renovation without solving the critical planning questions before you break the walls you are almost guaranteed to end up with a stalled project, an overbudget cost or a finished space that does not match your original idea. Planning is the key to avoiding these problems.
During the planning phase you should answer basic questions. First check the condition of the existing subfloor and plumbing. Second identify which fixtures and materials have long lead times that could delay the project schedule. Third figure out which permits are needed for the scope of work. Fourth decide the order for installing finishes with the chosen materials. Fifth set aside a contingency in the budget for any surprises that demolition might uncover. None of these questions are difficult. It is far simpler to answer them before construction starts than to try to fix them. Planning takes the guesswork out of the job.
When you are ready to discuss the scope the priorities and the next steps for your project contact Lone Star Remodeling Dallas. We will walk through the plan, with you before anything is finalized.
FAQ
How long does a full bathroom renovation typically take?
A complete bathroom renovation runs three to four weeks of active construction in most cases. That timeline assumes materials are on-site when construction begins. Specialty tile, custom vanities, and stone countertops can carry lead times of four to eight weeks, so material selection and ordering should happen well before the project start date is set.
What does bathroom rough-in planning involve?
Rough-in planning establishes the physical location of all plumbing and electrical infrastructure before walls are closed. It includes confirming toilet rough-in dimensions, shower valve position, supply and drain line routing, circuit allocation, and inspection scheduling. Decisions made at this stage determine what the finished bathroom can accommodate without costly mid-project corrections.
Why is complete bathroom waterproofing so important in a renovation?
Waterproofing protects every finish material installed above it. Failures at corners, transitions, and penetrations allow water to reach the substrate behind tile, causing damage that is typically invisible until it has become significant. Addressing waterproofing before new tile goes in costs far less than reopening a finished bathroom to correct it after the fact.
What is the correct finish installation sequence for a bathroom renovation?
Tile is installed first to establish the finished floor elevation. Cabinetry follows, then stone countertop templating when applicable. Plumbing trim, lighting, mirrors, and accessories are installed last, after painting, grouting, and caulking are complete. Respecting that sequence prevents rework and protects finished materials from damage during subsequent trades.
Do I need permits for a full bathroom renovation in Fort Worth?
Plumbing and electrical modifications in a full bathroom renovation typically require permits in Fort Worth. Tile replacement and cosmetic updates at existing fixture locations generally do not. A licensed contractor identifies the applicable permits for the specific scope and manages the inspection process as part of the renovation.